Readers need signposts to help them navigate long documents. Writers provide those signposts using headers and footers, blocks of text at either the top or bottom of the page, respectively. Headers and footers are visually separate from the main body of the document.
Page numbers may be the most common thing to put into either a header or footer, but you can put lots of other things there, including:
- chapter name (often formatted with the Heading 1 style – for more on styles you need to use, read this blog post.)
- section name (often formatted with the Heading 2 style)
- document title (often formatted with the Title style)
- number of words in a document (important for journalists, students and anybody else who need to write to word count)
- contact information
- date and time document was produced
- graphics
To create a header or footer in a Word document, follow these steps.
- From the Insert ribbon, choose Header or Footer, make the appropriate choice and configure your header or footer. Note that the Ribbon changes to Design, giving you the tools you need to create basic headers.
In older versions of Word, choose Header and Footer from the Insert menu.
In both cases, Word displays the header and footer prominently and makes the rest of the document lighter in appearance. - Click either the header or footer that you want to work on.
- Insert the element you want to place.
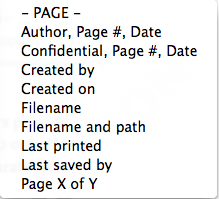
Word makes common header and footer choices easy to create, using either the Design ribbon or, as in Microsoft Word: Mac 2008, this submenu in the Insert, Autotext, Header/Footer menu option.

Both the Insert menu and the Insert ribbon let you add images to your documents. - To insert a chapter name, section name, number of words in the document or any other information that may change depending on the page you view or other criteria, use Word fields as explained in this blog post.