Have you ever set the format in one part of a long document only to find it messed up when you went back to it?
The gremlin you’re hunting may be the flipside of a feature known as styles.
In a nutshell, a style in a word processor combines a number of formatting elements (font, size, colour, lines, indenting, numbering and so forth) into one selection you choose from a menu (or the Ribbon in Microsoft Word).
Problems can occur when your document contains many more styles than you need. I could explain how they might have gotten there, but that wouldn’t solve your formatting problem.
What does help solve the problem? Paring down the list of styles available in your document to the styles you actually need. This can be a long process depending on the length of your document and the number of extra styles it contains, but it’s the shortest and surest way to get your document’s format under control.
Note: I’m using Microsoft Word for this example, but different word processors handle styles in similar ways. Check online help to learn how you can manage styles in your program.
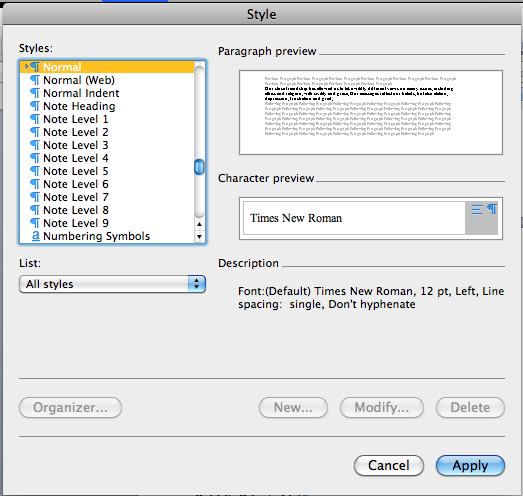
1. From the Format menu, choose Style. The Style dialog appears. In this case, the Style dialog shows a useful style, “Normal”. Most of your text ought to use the Normal style.
2. Under the Styes list, use the List menu to choose “Styles in use.” Word pares down the styles in this dialog to those actually attached to the document.
3. In the Styles list, click a style that you don’t need in this document, then click the Delete button (in the bottom right of the dialog).
4. Word displays a confirmation dialog. Click Yes.
5. Repeat the preceding two steps for each style you don’t need. (Not sure if you need a given style? Check out this blog post for a list of common styles and their uses.)
6. Once you eliminate the styles you don’t need, go through your document and apply the right styles to the places left “without style.”
