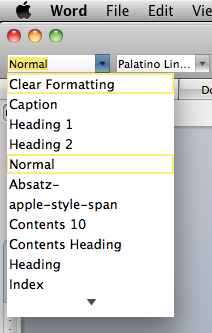
Styles are neat things. They let you minimize the amount of time you spend fiddling with the formatting in documents. This rarely matters if you only write two- or three-page memos, but try making a 185-page book look consistent – all fonts, headings, margins, graphical elements and so forth – from end to end and you’ll come to appreciate the power of styles.
Applying word processing styles isn’t difficult. I’ll use Microsoft Word in this explanation, but the procedures don’t vary that much in other word processors. Check online help for specific instructions in your word processor.
To apply a style to given text, follow these steps:
1. Click in the text you want to change (you don’t need to select it all).
2. Find your Styles menu (I’m using the old-fashioned Word menu – more modern versions of Word have Styles toolboxes in the Ribbon) and click the style you want to apply.

There! You’ve just applied a Word style to text in your document. Do that to each portion of text you want to look the same, and you gain greater control over the look of your document.
Try the different styles you find to see which ones you prefer to use. You can, of course, change styles to do things like make your headings different colours or captions smaller or larger… but that’s a topic for another blog post.
Update: here’s a short video that shows style application in Apple’s word processor, Pages. Users of Word, OpenOffice and other programs might want to watch too: the narrator clearly explains key concepts behind styles as he demonstrates their application.
http://www.youtube.com/watch?v=CKWQDfJzdiA
